CREAR MAVEN PROJECT
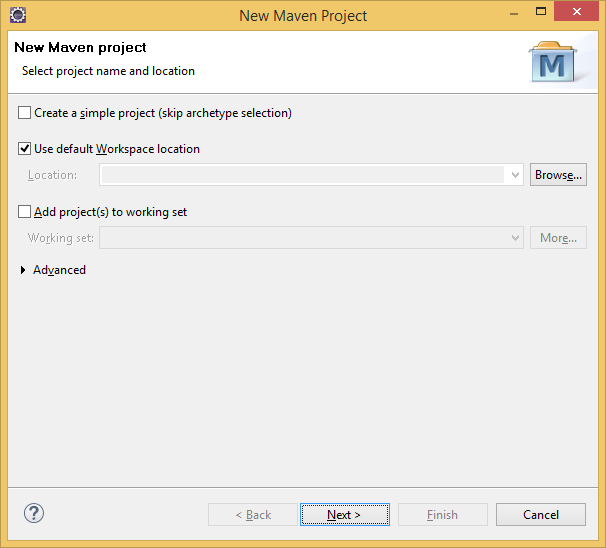


Luego de darle FINISH, lo más seguro es que nos aparezca el siguiente error:
The superclass "javax.servlet.http.HttpServlet" was not found on the Java Build Path
Para resolver este problema debemos configurar el Build path del proyecto.
CONFIGURAR EL BUILD PATH DEL PROYECTO
Debemos asignar el Server Runtime enviroment correcto a nuestro proyecto, entonces
hacemos click derecho sobre el proyecto
Properties ->
Java Build Path ->
Add Library...->
Server Runtime -> Apache Tomcat -> Finish.
Verifica que la libreria de JRE del proyecto sea la correcta, si no así, agregala.
haciendo click derecho sobre el proyecto
Properties ->
Java Build Path ->
Add Library...->
JRE System Library -> Workspace default JRE (jdk1.8.0_65) -> Finish.

EDITAR EL POM.XML GENERADO
Debemos agregarle las Spring dependencies.
(en el ejemplo, también se agregan las de JUnit, Jstl y Logging)
[code] <project xmlns="http://maven.apache.org/POM/4.0.0" xmlns:xsi="http://www.w3.org/2001/XMLSchema-instance" xsi:schemaLocation="http://maven.apache.org/POM/4.0.0 http://maven.apache.org/maven-v4_0_0.xsd"> <modelVersion>4.0.0</modelVersion> <groupId>ProjectMaven001</groupId> <artifactId>ProjectMaven001</artifactId> <packaging>war</packaging> <version>0.0.1-SNAPSHOT</version> <name>ProjectMaven001 Maven Webapp</name> <url>http://maven.apache.org</url> <dependencies> <dependency> <groupId>junit</groupId> <artifactId>junit</artifactId> <version>3.8.1</version> <scope>test</scope> </dependency> <dependency> <groupId>org.springframework</groupId> <artifactId>spring-context</artifactId> <version>4.1.1.RELEASE</version> </dependency> <dependency> <groupId>org.springframework</groupId> <artifactId>spring-aop</artifactId> <version>4.1.1.RELEASE</version> </dependency> <dependency> <groupId>org.springframework</groupId> <artifactId>spring-webmvc</artifactId> <version>4.1.1.RELEASE</version> </dependency> <dependency> <groupId>org.springframework</groupId> <artifactId>spring-web</artifactId> <version>4.1.1.RELEASE</version> </dependency> <dependency> <groupId>javax.servlet</groupId> <artifactId>jstl</artifactId> <version>1.2</version> </dependency> <dependency> <groupId>commons-logging</groupId> <artifactId>commons-logging</artifactId> <version>1.1.3</version> </dependency> </dependencies> <build> <sourceDirectory>src/main/resources</sourceDirectory> <plugins> <plugin> <artifactId>maven-compiler-plugin</artifactId> <version>3.3</version> <configuration> <source>1.8</source> <target>1.8</target> </configuration> </plugin> </plugins> </build> </project> [/code]
Cuando guardes estos cambios se empesarán a bajar las librerias que le indicamos que ibamos a necesitar.
Seguramente obtengas el siguiente error.
Project configuration is not up-to-date with pom.xml.
Lo cual solucionaremos, haciendo clic derecho sobre el proyecto,
-> Maven->Update Project...
Si el error es
Cannot change version of project facet Dynamic Web Module to 3.1
ir a la carpeta .settings
abrir el archivo org.eclipse.wst.common.project.facet.core.xml y
cambiar la linea
<installed facet="jst.web" version="2.3"/>
por esta
<installed facet="jst.web" version="3.1"/>
EDITAR EL ARCHIVO WEB.XML
[code] <?xml version="1.0" encoding="UTF-8"?> <web-app xmlns:xsi="http://www.w3.org/2001/XMLSchema-instance" xmlns="http://xmlns.jcp.org/xml/ns/javaee" xsi:schemaLocation="http://xmlns.jcp.org/xml/ns/javaee http://xmlns.jcp.org/xml/ns/javaee/web-app_3_1.xsd" version="3.1"> <display-name>Archetype Created Web Application</display-name> <context-param> <param-name>contextConfigLocation</param-name> <param-value>/WEB-INF/dispatcher-servlet.xml</param-value> </context-param> <listener> <listener-class> org.springframework.web.context.ContextLoaderListener </listener-class> </listener> <servlet> <servlet-name>dispatcher</servlet-name> <servlet-class> org.springframework.web.servlet.DispatcherServlet </servlet-class> <load-on-startup>1</load-on-startup> </servlet> <servlet-mapping> <servlet-name>dispatcher</servlet-name> <url-pattern>/</url-pattern> </servlet-mapping> </web-app> [/code]
Una vez que el DispatcherServlet es inicializado buscará un archivo llamado
[servlet-name]-servlet.xml Donde:
[servlet-name] es el nombre definido entre los tags <servlet-name>dispatcher</servlet-name>
CREAR EL ARCHIVO DISPATCHER-SERVLET.XML
[code] <beans xmlns="http://www.springframework.org/schema/beans" xmlns:context="http://www.springframework.org/schema/context" xmlns:xsi="http://www.w3.org/2001/XMLSchema-instance" xsi:schemaLocation=" http://www.springframework.org/schema/beans http://www.springframework.org/schema/beans/spring-beans-3.0.xsd http://www.springframework.org/schema/context http://www.springframework.org/schema/context/spring-context-3.0.xsd"> <context:component-scan base-package="com.isra.projectmaven001.controller" /> <bean class="org.springframework.web.servlet.view.InternalResourceViewResolver"> <property name="prefix"> <value>/WEB-INF/views/</value> </property> <property name="suffix"> <value>.jsp</value> </property> </bean> </beans> [/code]
donde,
base-package: es el paquete de los controladores
prefix: el directorio donde irán nuestras vistas (luego, hay que crear ese directorio)
suffix: la extensión de las vistas. ( por ejemplo si desde el controlador se la llama como "holamundo" esta deberá ser creada en web-inf/views como holamundo.jsp )
CREAR EL ARCHIVO CONTROLADOR
New -> Class

donde:
1)
@RequestMapping("/hello")
public ModelAndView showMessage( ...
mapea las llamada "hello" con el método "showMessage"
2)
@RequestParam(value = "name", required = false, defaultValue = "Don Anonimo") String name) {
indica que a la llamada se le puede adjuntar un parámetro, que en este caso no es obligatorio (required=false) y que tiene un valor por defecto "Don Anonimo"
3)
ModelAndView mv = new ModelAndView("holamundo");
determina la vista que será llamada desde el método.
EDITAR INDEX.JSP
[code] <%@ page language="java" contentType="text/html; charset=ISO-8859-1" pageEncoding="ISO-8859-1"%> <!DOCTYPE html PUBLIC "-//W3C//DTD HTML 4.01 Transitional//EN" "http://www.w3.org/TR/html4/loose.dtd"> <html> <head> <meta http-equiv="Content-Type" content="text/html; charset=ISO-8859-1"> <title>Spring 4 MVC - HelloWorld</title> </head> <body> <center> <h2>Hola Mundo</h2> <h3> <a href="hello?name=Isra">Clickea aquí</a> </h3> </center> </body> [/code]
CREAR LA VISTA QUE LLAMARÁ EL CONTROLLER
[code] <%@ page language="java" contentType="text/html; charset=ISO-8859-1" pageEncoding="ISO-8859-1"%> <!DOCTYPE html PUBLIC "-//W3C//DTD HTML 4.01 Transitional//EN" "http://www.w3.org/TR/html4/loose.dtd"> <html> <head> <meta http-equiv="Content-Type" content="text/html; charset=ISO-8859-1"> <title>Spring 4 MVC</title> </head> <body> <center> <h2>Hola Mundo</h2> <h2> ${message} ${name} </h2> </center> </body> [/code]
EJECUTAR EL PROYECTO
Click derecho sobre el proyecto


http://localhost:8080/ProjectMaven001/hello?name=Isra


